Using Certificates
The Credential Type switch
With Auth Mode set to Azure Client Credentials (on both MCP connection and HTTP connection dialogs), a Credential Type control chooses how the connection authenticates:
- 🔑 Client Secret — today’s behaviour: an inline secret or an Azure Key Vault reference.
- 📜 Certificate — a certificate from the local store, used with
ClientCertificateCredential.
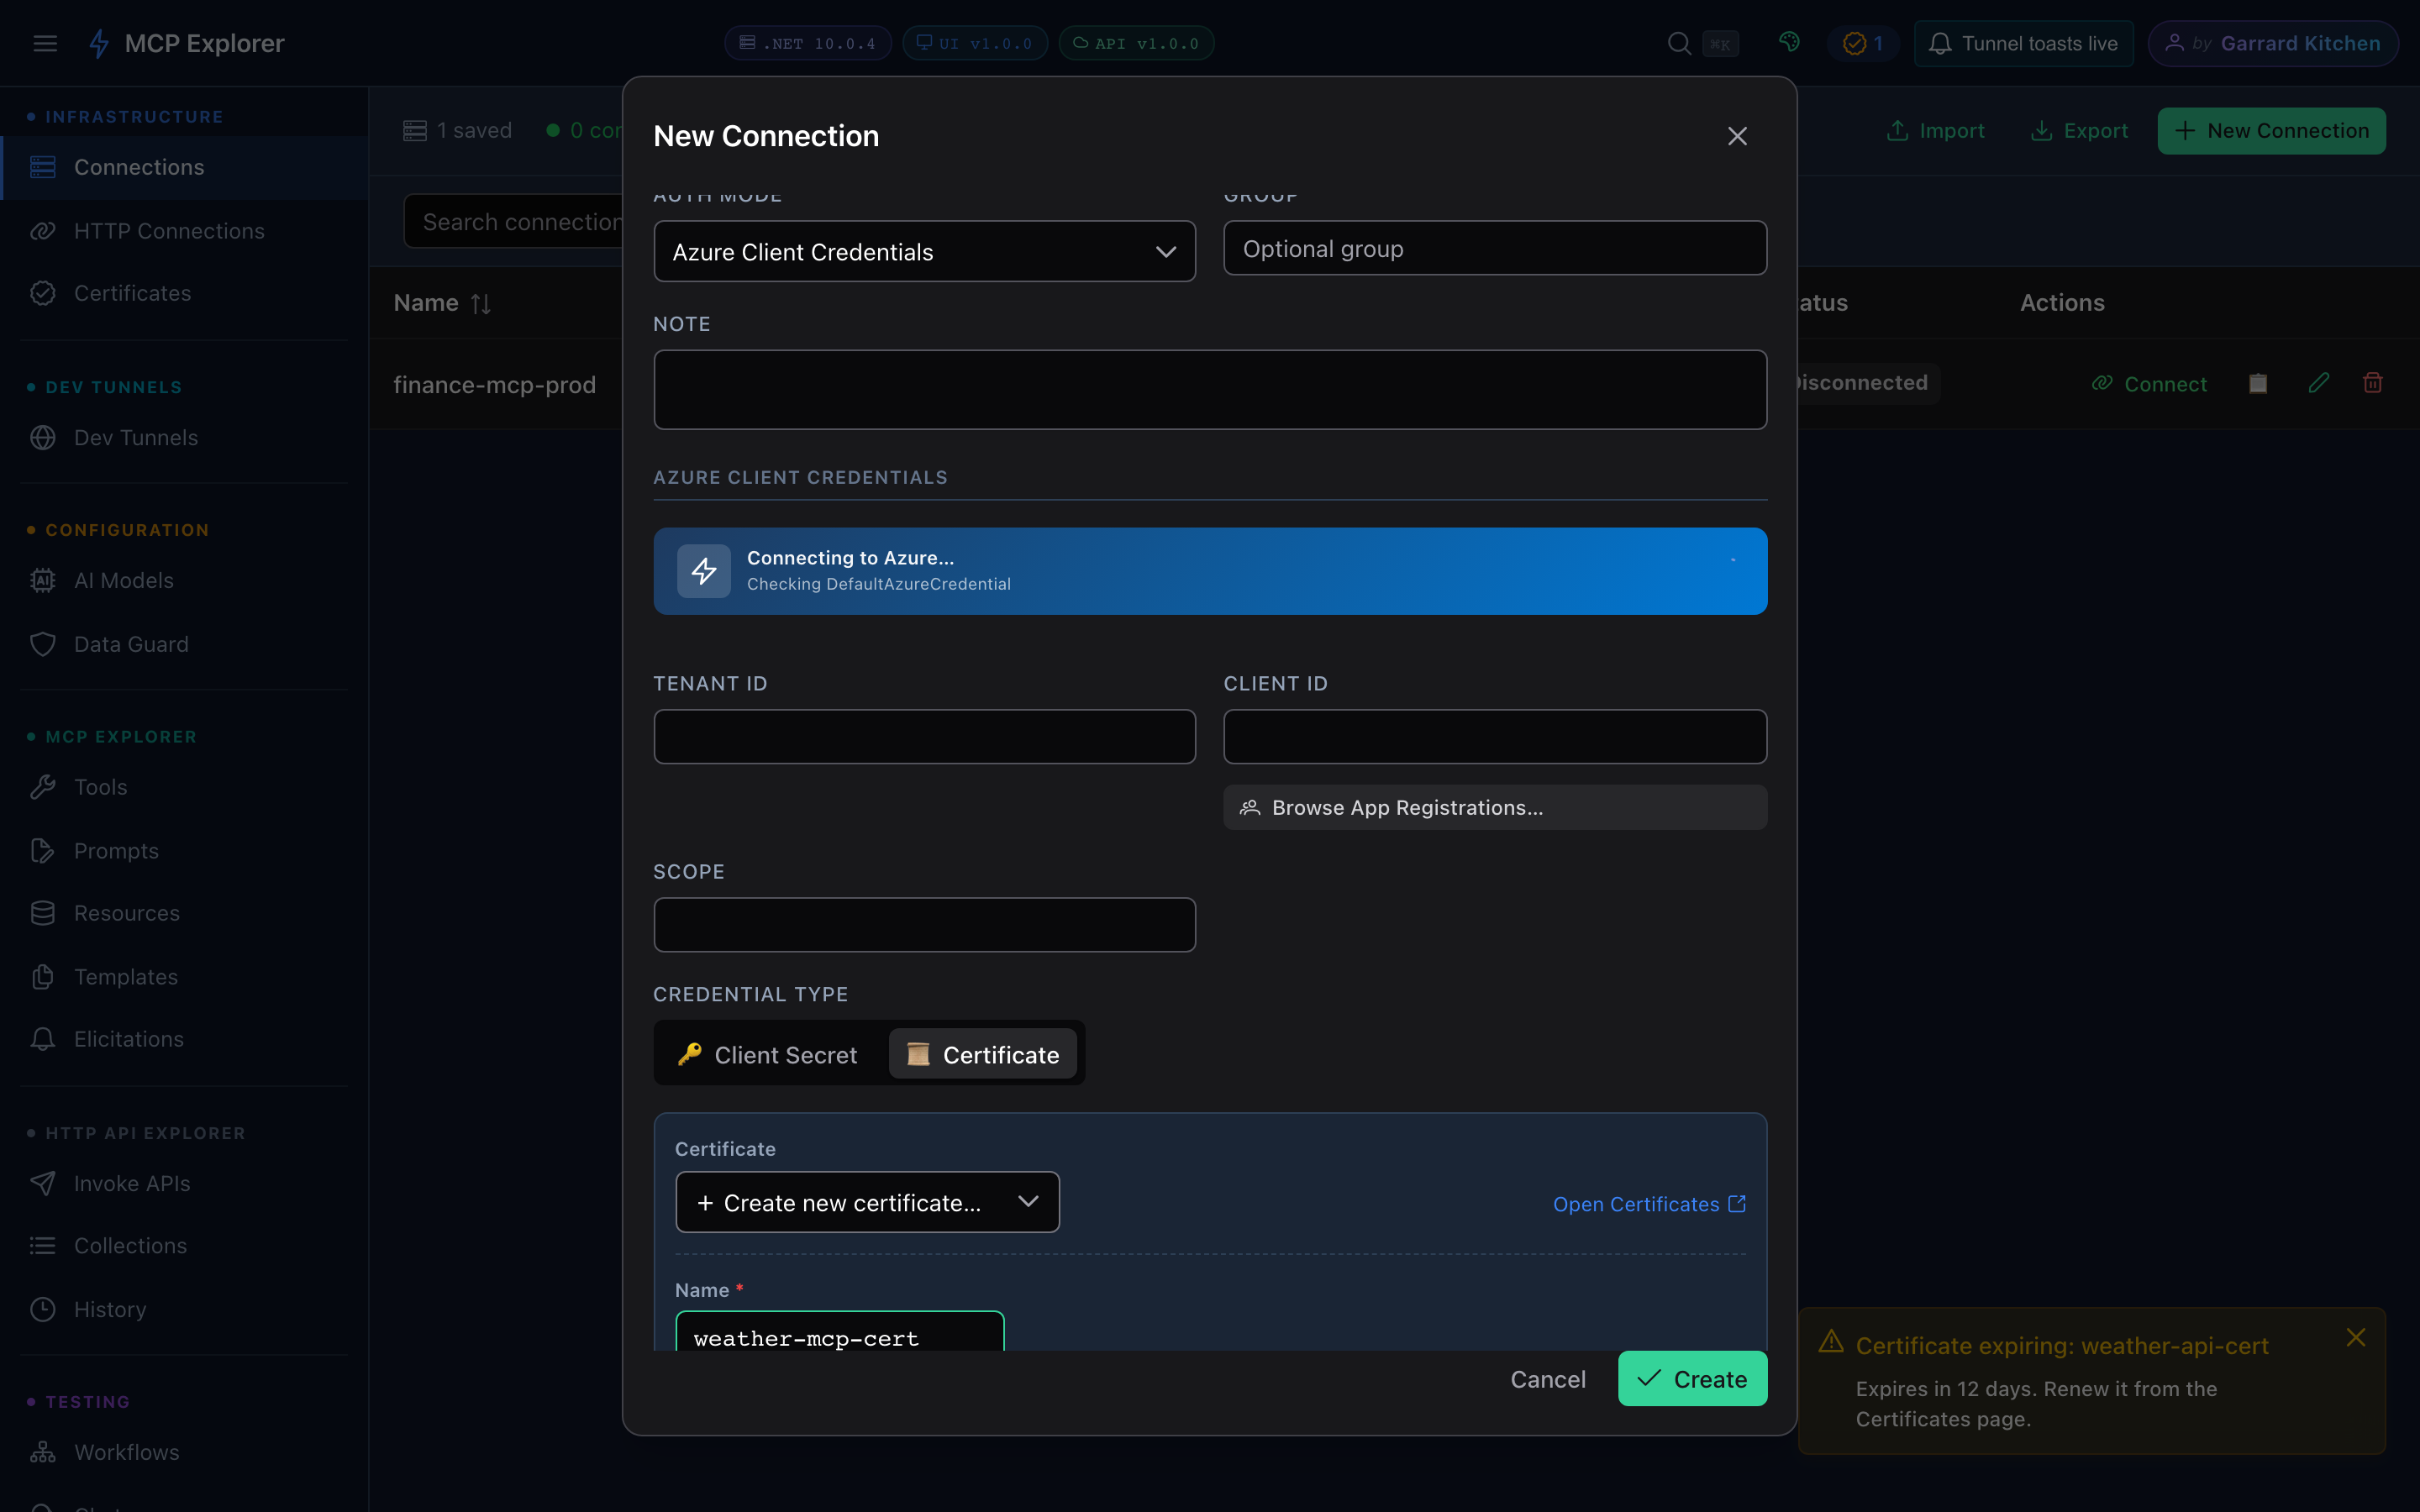
Switching Credential Type to Certificate reveals the certificate panel — pick an existing certificate or create one inline.
Only one credential kind is persisted: saving in certificate mode clears any secret/Key Vault reference, and vice versa.
Creating a certificate inline
Choose + Create new certificate… in the certificate dropdown to expand the inline generator:
| Field | Notes |
|---|---|
| Name | Store name — lowercase letters, digits, hyphens (e.g. finance-api-cert). Pre-filled from the connection name. |
| Subject (CN) | Defaults to mcp-explorer-{name}. |
| Key size | RSA 2048 (default) or 4096. |
| Valid for | 6, 12 (default), or 24 months. |
| PFX password | Optional — also writes a password-protected cert.pfx alongside the PEM files. |
Generate certificate runs with step-by-step progress: key-pair generation, X.509 creation (SHA-256), file writes, and metadata/audit. Generation is pure .NET — no OpenSSL required.
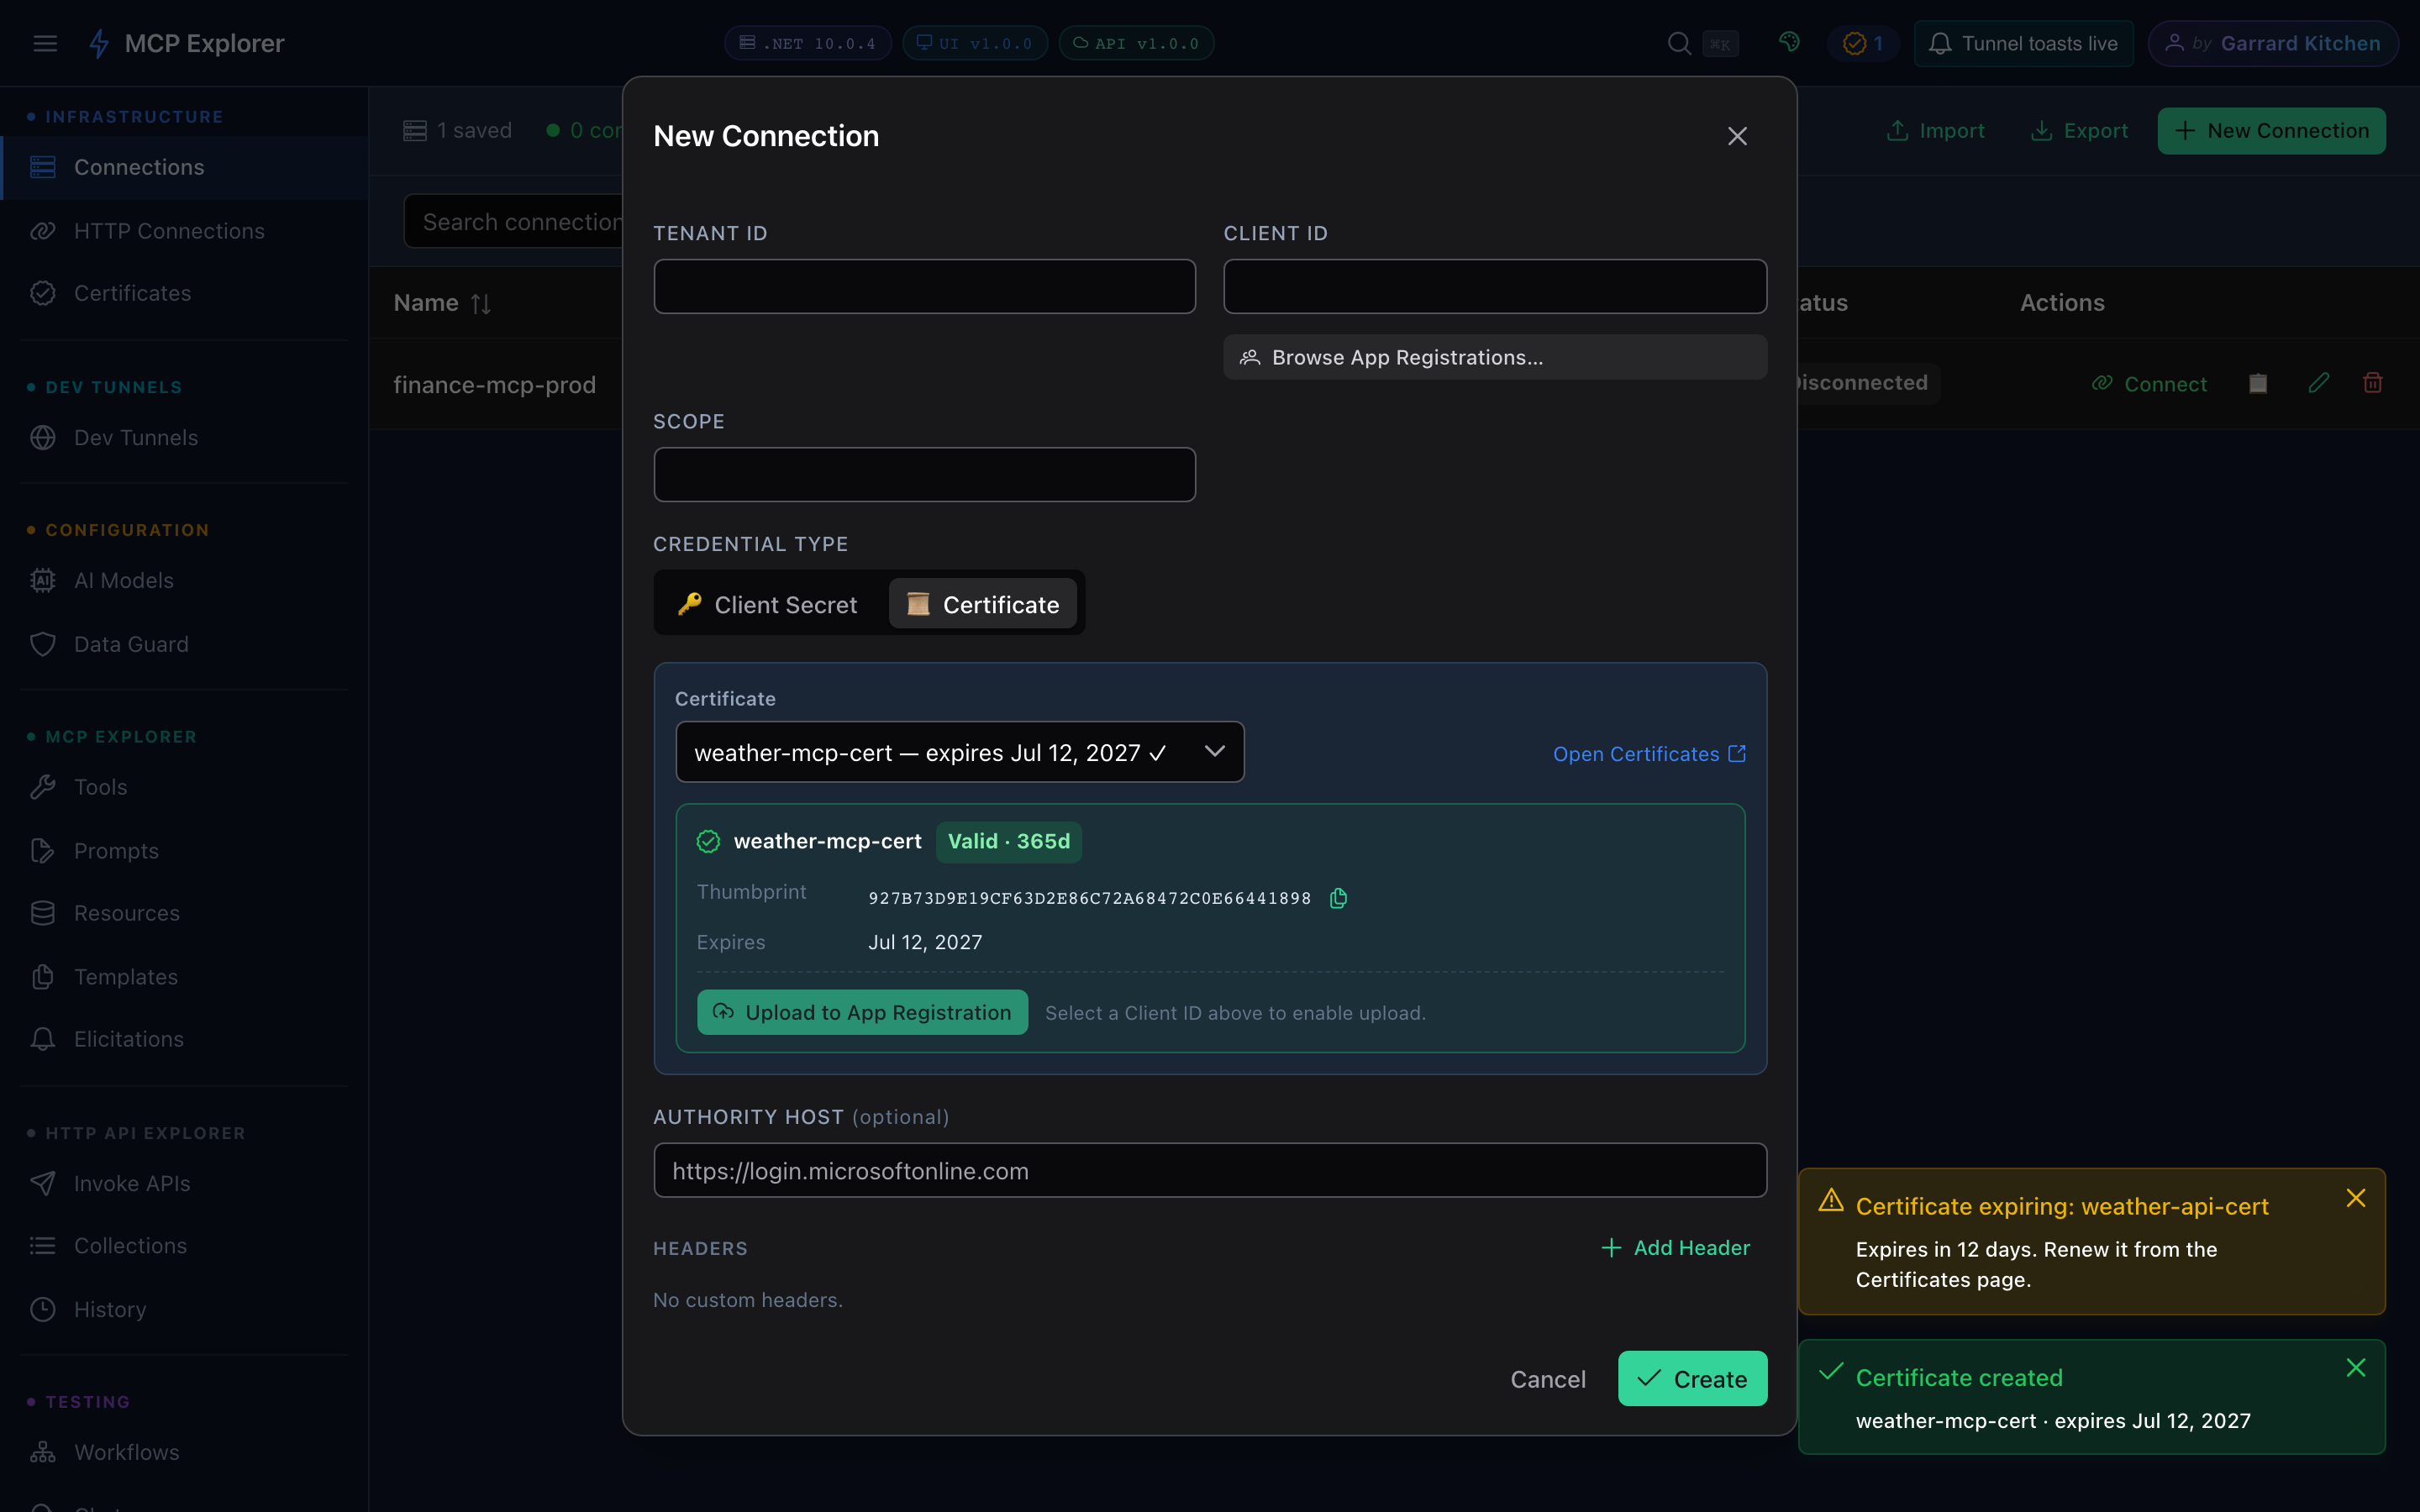
After generation: the summary card shows the thumbprint and expiry, with upload one click away.
You can also create certificates from the Certificates page (New Certificate), and pick them later from any connection dialog.
Uploading to an App Registration
Upload to App Registration adds the public certificate to the app’s key credentials via Microsoft Graph — the private key never leaves the machine. The button enables once a Client ID is selected above (use Browse App Registrations… to pick one). Steps:
- Load the certificate from the local store
- Fetch the app registration (requires
az loginor equivalentDefaultAzureCredentialchain) - Append an
AsymmetricX509Certkey credential — idempotent: re-uploading the same thumbprint is a no-op - Re-read and verify the thumbprint landed
Your account needs Application.ReadWrite.OwnedBy (or Owner on the app registration); a permission failure shows a clear, retryable error and the certificate stays safe in the local store — you can always upload later from the Certificates page.
Entra ID propagation — Graph reads can lag a successful upload by a few seconds. The verify step polls with backoff; if the credential still isn’t visible it reports the upload as succeeded-pending-verification and the Verify action on the Certificates page confirms (and reconciles) it shortly after.
Testing token acquisition
After uploading, Test token acquisition runs a dry-run ClientCertificateCredential flow against your Tenant ID / Client ID / Scope and reports the token expiry on success. Newly uploaded certificates can take 30–60 seconds to propagate in Entra ID — if the test fails immediately after an upload, wait a moment and retry.
The Certificates page
Infrastructure → Certificates lists everything in the local store:
- Stat tiles — total certificates, uploaded to app registrations, expiring within 30 days, expired.
- Table — subject, SHA-1 thumbprint chip (click to copy), expiry status tag, App Registration upload state, and how many connections reference each certificate.
- Detail row (expand) — files on disk, full SHA-1/SHA-256 thumbprints, used-by chips, per-app Verify / Manage actions, and export buttons.
Downloads: PEM returns the public certificate only. Export PFX (includes the private key) always requires a password and is audit-logged. Deleting a certificate is blocked with a clear message while any connection or HTTP API definition still references it.